Just as a quick review, the layers to the floor are as follows:
- well sanded, rough-cut hemlock 1-by sub-floor
- Homasote (for more information on this product, see my post here)
- slate tiles placed into a cement mortar bed
- grout in between the tiles
- AFM Safecoat’s Grout Sealer
- AFM Safecoat’s Mexeseal Tile Sealant
And now the details!
The Homasote was both glued and screwed down. In looking for an appropriate adhesive, I spoke at length with the gentleman from the natural building supply company we were working with. He highly recommended a product called Solvent Free Titebond Multi-Purpose Flooring Adhesive. He explained that it works very much like a traditional adhesive, is comparable to AFM’s adhesive, as far as chemical exposure goes, but at half the price. We went with it and have no complaints. I was out of the area when it was being applied and stayed away for a while afterward, but any fumes that it did create seemed to clear quickly and it did not cause any on-going health problems for us. We have a can leftover and do plan on using it again in the future.
For both the mortar bed and the grout, we went with the standard options available at our local hardware store. We did check and try to get the cement with the least additives, etc. We felt like the traditional products would be fairly safe, once cured, especially it would be mostly covered by tile and then well sealed.
 ::The floor with the “haze” on it from applying the grout.::
After some of the comments I received on previous posts, I want to clarify that we did not install this floor on our own. Neither Steve nor I had any experience with tiling and we felt it best to have some professional help. B the Builder was kind enough to oblige, despite his general aversion to tiling! For my part, I tracked down the slates, researched the materials and designed all of the boarders. There is a pattern around the edge of the room and a slightly more intricate pattern around the hearth. For the center of the room I just asked that he lay the tiles in a random manner. Steve stepped in towards the end, working to scrub the haze and then taking over and doing all of the sealing.
::The floor with the “haze” on it from applying the grout.::
After some of the comments I received on previous posts, I want to clarify that we did not install this floor on our own. Neither Steve nor I had any experience with tiling and we felt it best to have some professional help. B the Builder was kind enough to oblige, despite his general aversion to tiling! For my part, I tracked down the slates, researched the materials and designed all of the boarders. There is a pattern around the edge of the room and a slightly more intricate pattern around the hearth. For the center of the room I just asked that he lay the tiles in a random manner. Steve stepped in towards the end, working to scrub the haze and then taking over and doing all of the sealing.
Now that we’ve seen the process first-hand, we both agree that we’d feel comfortable attempting future tiling projects ourselves.
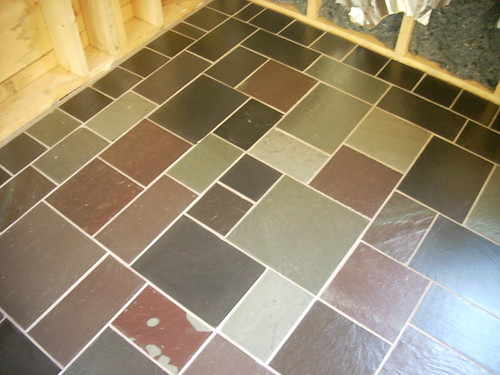
 ::the corner around the hearth::
These pictures were taken shortly after it was sealed. The finish did become less glossy over time and more like the matte finish that you would tend to expect of a slate floor. Of course, it’s never again been as clean as it was in these pictures either!
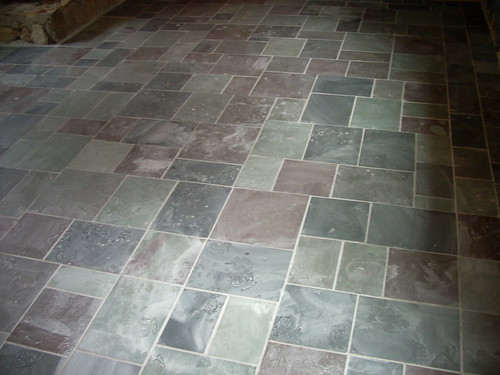
 ::general view of the pattern::
One note about the grout sealer; when Steve first applied it, it left a film all around the edges of the tiles that drove me crazy. I’m happy to say that with time that did clear and we are both quite pleased with the results.
::general view of the pattern::
One note about the grout sealer; when Steve first applied it, it left a film all around the edges of the tiles that drove me crazy. I’m happy to say that with time that did clear and we are both quite pleased with the results.
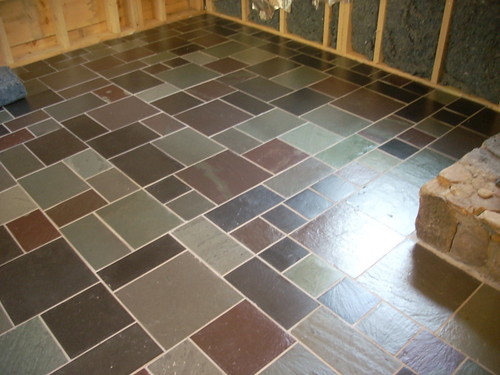
 ::far corner of the room::
I just came across your blog, and I had to comment to say that you did such a wonderful job on this floor. It looks truly amazing, and the colours work so well together! I hope you don’t mind if I stick around for your Healing Home updates, I’m interested to see what you come up with next.
Thank you! Of course, please enjoy!